Saturday, September 6, 2014

Extra Grand Sentiments Clear Stamps

Today I have some cheery cards to share with you.  So glad that you could join in the JustRite September Release Hop. Here are my cards for today.


For these cards I used the new Extra Grand Sentiments Clear Stamps, Extra Grand Sentiments SVG digital download cut files, and Garden Trellis Cling Background Stamp.


Have you been able to catch the Tutorial Tuesday videos from JustRite each week? Darsie Bruno and Heidi Blankenship have been so inspiring. I just had to experiment with some of my stamps.

Here are a few backgrounds that I tried with multicolor ink pads, Faber-Castel Gelatos and Big Brush markers, and embossing powders. It is amazing how one stamp could look so different!


STAMPING EXPERIMENTS:
Bottom Right--stamped and embossed in white with Faber-Castel Gelatos in the negative area & baby wipes (thanks Darsie!)
Bottom Left--stamped and embossed in white with Faber-Castel Big Brush Markers & baby wipes
Middle--stamped using a multi-color ink pad. I inked the right side all the way down, then flipped the pad and inked the left side. The image shown was the first stamping of my inking. I stamped it a second time and got a neat muted image. I'm saving that for another project.

Next I inked and stamped the sentiments. They are so much fun to stamp! I also used the matching SVG digital download cut files. Stamping on the SVG cut file was easy too. Because these stamps are clear you can easily align the stamped image to the cut file. 


I have to let you in on a secret! I can't stand to waste paper. So when I cut my SVG files I cut an entire page. You can imagine how many cuts I have for each of my stamp sets! 

I had 2 gallon size ziplock bags of cuts each in their little baggie. Last weekend I finally taped the smaller baggie to each stamp set. I can now have both items in one spot. Maybe I will make more cards too!


Thanks for stopping by. Hope you found a few bits of inspiration for today.

Please visit my friends on the JustRite Design Team. They have fabulous projects to share with you today!


The card was finished out with papers from The Paper Studio® Textured Cardstock Darks pad and Bright pad. The iridescent paper is one that I have had for a very long time I think it was through Crayola®. I added white ribbon from Stamp Simply Ribbon store with Sharon Johnson. I added bits of striped string and iridescent gems. The last thing I added was the feathers. I am addicted to them.


Happy Stamping!
Grace & Peace,
Amy

Tuesday, August 5, 2014

Elegant Fan Elements Clear Stamps

Today I get to show you three different projects that I made with the Elegant Fan Elements Clear Stamps.

This first one is more of a Victorian fan. I liked mixing the classic and the fresher colors. I wish I had taken photos along the way as I was creating the card.


I stamped the fan stamp on teal paper and embossed with white embossing powder. Afterwards I die cut five out using the JustRite Vintage Fan Dies. I also die cut five of the tab elements and one Vintage Flourish One Die. Everything was easy to layer and glue down. I tucked portions of a paper doily behind each fan blade and added jewels. The flower, bow, and feathers were added to give it that Victorian feel. I needed a medium shade of teal for the left side. Since I didn't have one I stamped the Burlap Background Cling stamp on the teal paper. It gave it just enough color to anchor the fan.

This is the Elegant Fan Elements Clear Stamps set. This clear set has 13 stamps. The fan shape fits in the Vintage Fan Die. Plus it has 2 SVG Digital Download files available for it.


This fan was the first one that I made. It is very bright! I followed the same steps that I did for the teal set.

Here is my third card using the Elegant Fan Elements and the SVG Digital Download files. I think this one is my favorite. I like the smaller square card size. As I was stamping and die cutting this set I thought it would be nice to have an SVG for the other two large elements in the stamp set. Next came an SVG Envelope and notecard! This card was so easy to put together. 


To warm the pink card stock I stamped it with the Burlap Background Cling stamp. (That might be one of my all time favorite stamps!) After I used my Silhouette Cameo to cut the envelope I stamped and embossed the flaps. I cut an extra "flap" to use as a header on the card. I layered the offset cut for the border to create the edge of the card. I dabbed ink on the pink SVG cut borders to give them a deeper pink tone.

These two images show the two different SVG Digital Download sets you can get.


The SVG Elegant Fan Elements has both exact and offset cuts for the stamps. They are so easy to use.

I have one more project to share with you. My sweet niece, Bekah, had surgery this spring on her hips. I was able to spend a week with my sister and her family. It was so nice to be able to spend time with them. I will have to share their incredible journey with you soon. One of my favorite things to do with Bekah's sister, Kayla, is craft. Kayla has a keen eye for design. I can't wait to see how God will use my talented niece. 

I took a huge box of stamps to test. I knew Kayla would be the perfect helper. Here is a project that Kayla made along with our selfie. I love it that the stamps are made with such quality. I knew that the stamps would hold up to lots of stamping.


Hope you enjoyed the projects today. Here is the list for the rest of the hop. Make sure you visit each one. The Design Team made amazing projects!
Happy Stamping!
Grace & Peace,
Amy

Thursday, July 10, 2014

Fall Appliqué Clear Stamps

Fall is my favorite season! I love the crisp air, the beautiful colors, football, and meals in the oven. So designing a Fall Appliqué Clear Stamp set was a must! Here is my project using the Fall Applique Clear Stamps.


This month JustRite is releasing my Fall Applique Clear Stamps. It has 24 stamp images. There is a nice mix of colorable images as well as mix and match sentiment and verse. The best part is that there is also a coordinating SVG Download Cut File available for this set! That makes this project very easy.


The SVG Web image shows the "Exact Cut" images. The Download comes with 2 sizes. Exact cut and Off set cut. That allows you to make fun mat layers for your die cut colorable stamped images.


To make the pumpkin I cut 10 of the biggest pumpkins to ensure I had plenty. Then I stamped the biggest pumpkin from the set in black ink. Next I played with 4 colors of inks and the background stamps: Memento Inks—Potter's Clay, Rhubarb Stalk, Cantaloupe, and Tangelo. I picked background stamps to create a wide range of patterns. Burlap Cling Background Stamp (one of my favorites) is used on all of the pumpkin slices.  Have fun and play with the different stamps to get the desired darkness for each section. 


Next I selected which panel I would use from each of the pumpkins. Then I cut each slice. I aligned the slices with tape. Next I stamped the stem, leaf, vine, and maple leaf in Pear Tart. The acorn was stamped in Rich Cocoa. On the extra pumpkin leaf I stamped Elegant Fronds Cling Background Stamp in Cottage Ivy. I cut the vine and stem with my x-acto knife. I wished I had used some spray mount to make it stick to my cutting mat. 

To make a frame for my sentiment I die cut JustRite Vintage Filigree Layer Die on a coordinating green paper. I lined it with white card stock and stamped my sentiment in Potter's Clay ink. I used foam tape to pop it up off the background.


To make the background of my card I stamped Shooting Stars Cling Background Stamp on a dark purple paper with silver ink before embossing. The green paper is from Momenta "bright" pack. For a bit of texture I stamped the JustRite Burlap Cling Background Stamp in green on the green paper.


The hardest part was selecting the ribbon, lace, and sparkles! It was that easy. 

It was fun using different stamps to make the designer paper for the pumpkin. "Sewing" appliqué with paper is so easy! I can't wait for you to try it.


Enjoy the hop! The designers have fabulous projects for you this month!


Good News — ALL of the JustRite Dies are 20% off! Use the special coupon code to receive the 20% discount at check out. 


Happy Stamping!
Grace & Peace,
Amy


Sunday, April 27, 2014

Coffee Cup Cling Stamp

Every day I enjoy waking up and spending the few quiet minutes in the morning with my cup of coffee. I enjoy reading and just getting ready for the start of another day. The card I have to show you today celebrates that fresh cup of morning coffee! This coffee cup looks like the ones my grandparents used for years. They had been used so often that the inside of the cup kept a rich coffee color. I would love to hear how you enjoy starting your day.


This project uses two stamp sets. The main one is the Coffee Cup Cling Stamp set. The image behind the coffee cup was stamped in bronze from the Magnolia Vintage Labels Seven Cling Stamp set. I die cut the stamped image using Vintage Labels Seven Dies. The two dark brown images in the back were die cut from a patterned piece of paper cut using Vintage Labels Five Dies.


For the coffee cup I used the downloadable SVG Coffee Cup Digital Cut file. It comes with both an "exact" cut and an "offset" cut. For my card I used the exact cut. I have tried a few different methods for stamping & cutting.

For the shading on the flower and coffee cup I used my Spectrum Noir markers. The ribbon and lace are from the Stamp Simply Ribbon Store. The sweet charm is from my friend, Heidi Blankenship.

The method that worked best for me was to cut first and then stamp. I cut several coffee cup images on the off white card stock. Then I inked my coffee cup stamp and layer it ink side up on the table. I gently placed the cut paper on top of the cling stamp aligning the edges with the ridges of the stamp.  Then I gently rubbed my finger across the back of the paper.  Then I flipped the acrylic block over and knocked the paper off the stamp. You may skip that if you don't mind having inky fingers. :)

Hope you enjoyed the project. Don't forget to let me know how you enjoy starting your day.

Happy Stamping!
Grace & Peace,

Amy


Wednesday, April 2, 2014

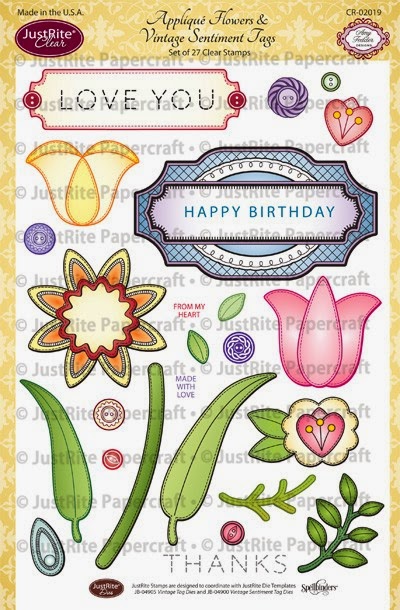
Appliqué Flowers and Vintage Sentiment Tags

Good morning friends! Thanks for joining us on the JustRite Blog Hop.  Today I have a cheery spring card to share with you. Maybe the springy cards will give our northern friends hope that the snow will melt soon.


It uses the April Release JustRite Appliqué Flowers & Vintage Sentiment Tag Clear Stamps  Burlap Cling Background Stamp  and  Home Tweet Home Clear Stamps. These have been some of my favorite sets to design. I designed this set to give you clean and colorable areas. You can stamp these on patterned paper, doodle inside, or even stamp inside of the areas. That is what I did on my card. I stamped the flower parts after stamping the Burlap Background Stamp in two different shades. Then I fussy cut.


For the shading on the petals and leaves I used the Spectrum Noir Pencils set. I have really loved using my markers and the pencils. The pencil over the marker really makes the images come alive.


The paper was from my paper stash. The sweet yellow ribbon was from the Stamp Simply Ribbon Store. The lace came on a spool from Hobby Lobby.
JustRite has TWO SALES running right now too. All the Gelatos and Spellbinders Dies are on sale! Shop early while supplies last!


To keep hopping follow the links below. There are so many beautiful projects in this hop. 


Happy Stamping!
Grace & Peace,
Amy

Monday, March 10, 2014

Stitched Flowers Vintage Tags hand cut

Good morning Friends! 

Hope you grabbed an extra cup of coffee today. I have another Stitched Flowers Vintage Vintage Tags card. This one I cut by hand. I stamped and colored them on patterned paper before trimming. 


This was a fun set to play with. It is part of the March Release. It also has a coordinating SVG Digital Download cut file. The SVG makes the cutting much easier. There is also a matching JustRite Die Vintage Tag Dies.


This was a fun set to color. While I was at CHA this winter I met the makers of the Spectrum Noir markers and pencils. Eva Dobilas and I got to see a few of their Design Team demonstrating these new markers. The talented Leann Chivers showed us how to blend the colors and overlay with the pencils. I just had to open up my sets and color. I have started with a blue and green set. 


The colors blended well. You should visit Leann's blog to see more about the Spectrum Noir products. I'll have to keep you posted on other Spectrum Noir products that I use.

Happy Stamping!
Grace & Peace,
Amy

Sunday, March 9, 2014

Baroque Frame Cling Background Stamp

Today's project was made using the Baroque Frame Cling Background Stamp, Hydrangea Vintage Labels Seven, and the SVG for Hydrangea Vintage Labels Seven. This was a fun card to make. Last fall dear friends of ours planted two hydrangea bushes for us. I have had so much fun watching them bloom. Now that winter is just about over I see some green sprigs coming on the stalks.


The Baroque Frame Background Stamp was stamped with white ink on the patterned paper and then embossed.


Next I cut the offset SVG cut for the Hydrangea Vintage Labels Seven. (It will be available soon. I have been testing them with my stamps.) While the cut image was still on my mat I stamped the hydrangea image. Being able to see the edges through the clear stamp was nice. If you are having trouble seeing the edge of your cut file while stamping try removing the leftover paper. Having just the cut image left on the mat makes it a bit easier to see when aligning the inked stamp. 


After the flowers and butterflies were stamped I used Copic markers to color the images. There is a bit of glitter on the the butterfly. The burlap, twine, and button were all from my sewing stash. The beautiful green silk ribbon was from the Stamp Simply Ribbon Store.   I used form tape to raise the flower off the burlap and hot glue to adhere the butterfly.

While I had the Sillhouette Studio software open I cut an army of butterflies. I stamped them and saved them in a baggie for other projects. They were fun and easy to do. 


Hope you enjoyed your stop along the hop. It has been fun to play along with the Design Team. You will love the rest of the hop. 


Happy Stamping!
Amy